Free Medivh!

Free Medivh! is the title of the final boss encounter found in the One Night in Karazhan adventure, the third and final encounter of the fourth and final wing.
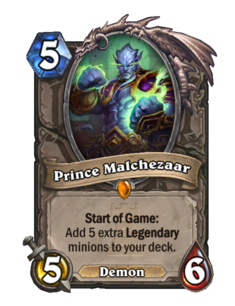
This final encounter sees Moroes attempting to locate Medivh using the tower's portals. Unfortunately, Moroes is not as adept at portal magic as his master, and accidentally opens a portal to Draenor of the time, resulting in the emergence of Nazra Wildaxe, an orcish warrior of the Old Horde, who must be defeated before the portal can be closed and Moroes can try again. Once Nazra is defeated, Moroes is able to open a portal to the correct location, allowing Medivh to return, but unfortunately Prince Malchezaar is also waiting, and the player must defeat the eredar lord in order to save the day, and the party.
Hero Powers[edit | edit source]
Nazra Wildaxe
| Normal | Heroic |
|---|---|
 |
 |
- Minions summoned
| Normal | Heroic |
|---|---|
 |
 |
Prince Malchezaar
| Normal | Heroic |
|---|---|
 |
 |
- Minions summoned
| Normal and Heroic |
|---|
 |
Special cards[edit | edit source]
Player
Nazra

Prince Malchezaar
Decks[edit | edit source]
The below classes are listed purely for reference, and have no effect on the boss' use of the cards during the battle.
Nazra Wildaxe
| Normal | Heroic | ||||
|---|---|---|---|---|---|
| Class | Card | Quantity | Class | Card | Quantity |
| Boss | 2 | Boss | Looming Presence | 2 | |
| Warrior | 2 | Warrior | 2 | ||
| 2 | 2 | ||||
| 2 | 2 | ||||
| 2 | 2 | ||||
| 2 | 2 | ||||
| 2 | 2 | ||||
| 2 | 2 | ||||
| 2 | 2 | ||||
| Neutral | 2 | 2 | |||
| 2 | 2 | ||||
| 2 | 2 | ||||
| 2 | 2 | ||||
| 2 | Neutral | 2 | |||
| 2 | 2 | ||||
Prince Malchezaar
| Normal and Heroic | ||
|---|---|---|
| Class | Card | Quantity |
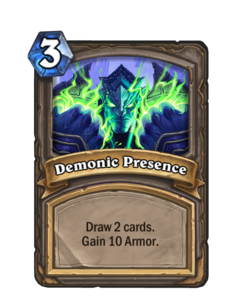
| Boss | Demonic Presence | 2 |
| 2 | ||
| Priest | 2 | |
| Warlock | 2 | |
| 2 | ||
| 2 | ||
| 2 | ||
| 2 | ||
| 2 | ||
| 2 | ||
| 2 | ||
| 2 | ||
| 2 | ||
| 2 | ||
| 1 | ||
| Warrior | 1 | |
Overview[edit | edit source]
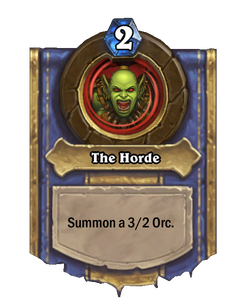
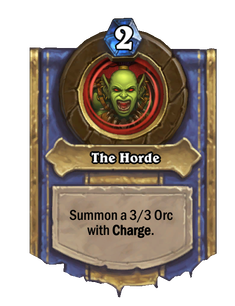
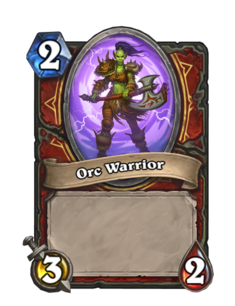
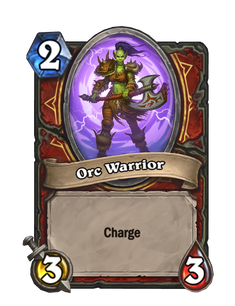
This is a two-stage fight. Nazra Wildaxe is the first and easier stage. She uses her Hero Power The Horde (Heroic) to summon Orc Warrior (Heroic), and uses many weapons to attack the player. Nazra plays aggressively and often ignores the player's minions in favour of going face, although she does use removal such as ![]() Bash,
Bash, ![]() Slam and
Slam and ![]() Execute. Destroying Nazra Wildaxe removes her weapon and all minions from her side of the board, but does not activate any of their Deathrattles.
Execute. Destroying Nazra Wildaxe removes her weapon and all minions from her side of the board, but does not activate any of their Deathrattles.
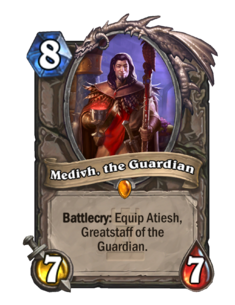
As soon as the player deals lethal damage to Nazra Wildaxe, the player's turn ends and Prince Malchezaar appears, with full Health (and Armor in Heroic mode), 8 mana (10 mana in Heroic mode), and a fresh deck and hand of cards; notably, he always draws ![]() Twisting Nether at the start of his turn. This allows Prince Malchezaar to always appear on his own turn, at which point he will usually (but not always) cast Twisting Nether, destroying all minions. When Prince Malchezaar appears, Medivh equips the player with
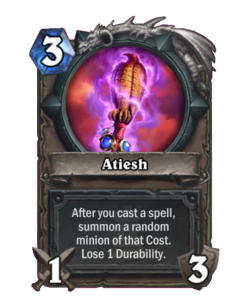
Twisting Nether at the start of his turn. This allows Prince Malchezaar to always appear on his own turn, at which point he will usually (but not always) cast Twisting Nether, destroying all minions. When Prince Malchezaar appears, Medivh equips the player with ![]() Atiesh.
Atiesh.
Notes[edit | edit source]
- Before Patch 17.0.2.45932 made
 Sacrificial Pact only usable on friendly Demons, thus disabling the interaction entirely, playing the spell upon Malchezaar would not kill him, instead prompting the special dialogue "Hahaha! That could never work on a true Eredar Lord!".
- However, if Sacrificial Pact was cast by other means with a minion (i.e. Yogg-Saron,
 Tortollan Primalist,
  Grand Archivist) and it targeted Malchezaar, it would successfully kill him, ending the match.[1] This may have been a bug.
 - Sacrificial Pact also worked if cast upon a demon minion and
 Mayor Noggenfogger randomly chose Malchezaar as the new target.
- However, if Sacrificial Pact was cast by other means with a minion (i.e. Yogg-Saron,
Strategy[edit | edit source]
Heroic
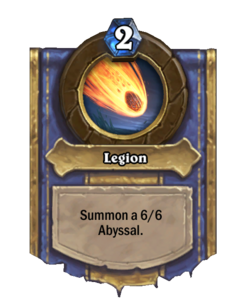
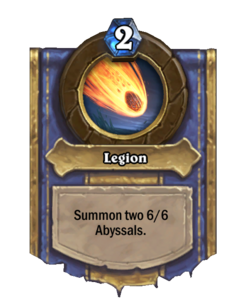
While the first stage is relatively easy to survive, the second stage is far harder, and on Heroic is extremely punishing due to Malchezaar's overpowered Hero Power Legion, summoning two 6/6s each turn in addition to his cards. As a result, various strategies exist designed around stalling the first stage until certain conditions can be met that enable the second stage to be won fairly quickly once reached.
One viable strategy is to use a OTK deck with ![]() Deathwing, Dragonlord. Mage, Druid, and Warrior all work well with this. Use Taunt minions and AoE spells to stall on the first fight until you have at least 15 damage in Dragons in your hand. Play Deathwing, Dragonlord and kill Nazra. When the Prince shows up he will wipe the board with Twisting Nether, thus filling it with your Dragons. Then simply kill him before he has time to gain back board control.
Deathwing, Dragonlord. Mage, Druid, and Warrior all work well with this. Use Taunt minions and AoE spells to stall on the first fight until you have at least 15 damage in Dragons in your hand. Play Deathwing, Dragonlord and kill Nazra. When the Prince shows up he will wipe the board with Twisting Nether, thus filling it with your Dragons. Then simply kill him before he has time to gain back board control.
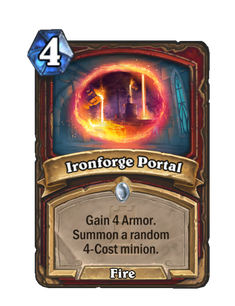
![]() Atiesh's triggered effect provides another way to win the second stage. By stalling the first stage until the player has reached 10 mana, it becomes possible to immediately cast a 10 mana spell upon entering the second stage, which will in turn summon a random 10 mana minion. Priests can make this work efficiently with
Atiesh's triggered effect provides another way to win the second stage. By stalling the first stage until the player has reached 10 mana, it becomes possible to immediately cast a 10 mana spell upon entering the second stage, which will in turn summon a random 10 mana minion. Priests can make this work efficiently with ![]() Mind Control, allowing them to steal one of the 6/6s at the same time, potentially granting them enough momentum to seize victory. That requires quite a bit of luck however, as several of the 10 mana minions have sub-par stats due to their strong battlecry effects (which will not take place when summoned via Atiesh.)
Mind Control, allowing them to steal one of the 6/6s at the same time, potentially granting them enough momentum to seize victory. That requires quite a bit of luck however, as several of the 10 mana minions have sub-par stats due to their strong battlecry effects (which will not take place when summoned via Atiesh.)
A strategy with a better chance of success for priests is a C'Thun deck. Charge up C'Thun during Nazra to frightening levels, then play him on turn one of Prince Malchezaar to deal massive (even lethal) damage. To be immediately lethal, C'Thun should be charged to 72 (or 36 with ![]() Brann Bronzebeard). Alternately, C'Thun can be returned to hand and played again on the next turn, or simply used to attack Malchezaar. Nazra usually ignores minions, so use this to your advantage by using multiple minions strong heal synergy --
Brann Bronzebeard). Alternately, C'Thun can be returned to hand and played again on the next turn, or simply used to attack Malchezaar. Nazra usually ignores minions, so use this to your advantage by using multiple minions strong heal synergy -- ![]() Northshire Cleric,
Northshire Cleric, ![]() Priest of the Feast,
Priest of the Feast, ![]() Lightwell,
Lightwell, ![]() Tournament Medic,
Tournament Medic, ![]() Circle of Healing,
Circle of Healing, ![]() Darkscale Healer, and of course,
Darkscale Healer, and of course, ![]() Hooded Acolyte.
Hooded Acolyte. ![]() Emperor Thaurissan should be used to lower the price of the Brann (or a return-to-hand spell or minion) and C'Thun combo.
Emperor Thaurissan should be used to lower the price of the Brann (or a return-to-hand spell or minion) and C'Thun combo.
Paladins can use ![]() Anyfin Can Happen to drown Malchezaar beneath a fishy tide of Murlocs played during the first stage, as well as activating Atiest for a random 10 mana minion. A similar strategy involves N'Zoth: stall the first stage with powerful Deathrattle minions, and draw N'Zoth; in the second stage play N'Zoth and immediately assail Malchezaar with the resulting board.
Anyfin Can Happen to drown Malchezaar beneath a fishy tide of Murlocs played during the first stage, as well as activating Atiest for a random 10 mana minion. A similar strategy involves N'Zoth: stall the first stage with powerful Deathrattle minions, and draw N'Zoth; in the second stage play N'Zoth and immediately assail Malchezaar with the resulting board. ![]() Stalagg and
Stalagg and ![]() Feugen are especially effective choices, with the death of each summoning
Feugen are especially effective choices, with the death of each summoning ![]() Thaddius.
Thaddius.
Similar to paladins, a popular shaman strategy involves ![]() Kel'Thuzad and
Kel'Thuzad and ![]() Ancestral Spirit, allowing Kel'Thuzad (and the rest of the board) to survive the Twisting Nether. Because of the way Kel'Thuzad's effect works, if the shaman's board is not already full, the copy summoned by Ancestral Spirit will then resurrect the Kel'Thuzad that died that turn, providing two Kel'Thuzads, which can then be used to create an unkillable army with which to beat down Malchezaar. (A second Kel'Thuzad can alternatively be procured through a subsequent
Ancestral Spirit, allowing Kel'Thuzad (and the rest of the board) to survive the Twisting Nether. Because of the way Kel'Thuzad's effect works, if the shaman's board is not already full, the copy summoned by Ancestral Spirit will then resurrect the Kel'Thuzad that died that turn, providing two Kel'Thuzads, which can then be used to create an unkillable army with which to beat down Malchezaar. (A second Kel'Thuzad can alternatively be procured through a subsequent ![]() Reincarnate.) Kel'Thuzad can also be a useful adjunct to many of the other strategies, allowing the player to repeatedly trade their minions into the Abyssals to counter Legion.
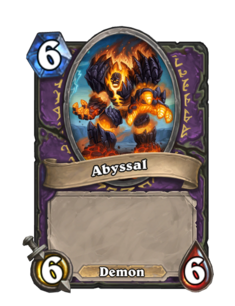
Reincarnate.) Kel'Thuzad can also be a useful adjunct to many of the other strategies, allowing the player to repeatedly trade their minions into the Abyssals to counter Legion.
A mage strategy is to counter Malchezaar's ![]() Twisting Nether entirely with
Twisting Nether entirely with ![]() Counterspell. This allows the player to build up (and keep) a large board presence during the first stage, ready for use in the second.
Counterspell. This allows the player to build up (and keep) a large board presence during the first stage, ready for use in the second.
Another strategy is to use a Jade Golem deck. Use the first stage to buff your Jade Golems so that newly summoned ones will be able to trade with Malchezaar's Abyssals, then spam them during the second stage. Having minions that summon Jade Golems with their Deathrattles (![]() Jade Swarmer or
Jade Swarmer or ![]() Aya Blackpaw) on the board when you kill Nazra will also provide you with some Jade Golems right away after Malchezaar casts Twisting Nether, giving you board advantage.
Aya Blackpaw) on the board when you kill Nazra will also provide you with some Jade Golems right away after Malchezaar casts Twisting Nether, giving you board advantage.
Videos
Rewards[edit | edit source]
Wing completion
As the final boss of The Spire, completing this encounter also awards the following cards:

Dialogue[edit | edit source]
Before match
- Moroes
- We've done it! Open the portal and let's get this party started!
Nazra Wildaxe
Introduction
- Moroes
- This is it!
- *Nazra Wildaxe appears from the portal*
- Nazra Wildaxe
- Nazra will rule this puny world!
- Moroes
- Oops, wrong portal. Fight the orc so I can try again!
- Nazra Wildaxe
- Cower before the Horde!
Emote Response
- Nazra Wildaxe
- Nazra will crush you!
Turn 1
- Moroes
- Sorry, take care of this one and I’m sure I can find the right controls.
Turn 4
- Moroes
- Force the orc back so we may open another portal!
Turn 6
- Moroes
- So many portals. I wonder what is in this one?
- Oh, that’s the tentacle world. We definitely don’t want that.
Player's cards
- Nazra Wildaxe
 Cho'gall
- Twilight Hammer clan? Here?
- Grommash Hellscream
- Grommash?! It's been so long!
Death
- Nazra Wildaxe
- (screams)
- Moroes
- Excellent! Now let's see if this one works…
Prince Malchezaar
Introduction
- Moroes
- Hmmm... Let's see. Maybe this one?
- *Prince Malchezaar appears, followed by Medivh*
- Prince Malchezaar
- Summoned back to Karazhan? Just in time for the party!
- Medivh
- Ah, a guest! Please take care of the demon, would you. I have a party to host!
- Here, borrow my staff; it controls the portals. Just don't scratch it.
- Prince Malchezaar
- Out of my way, fool!
Turn 1
- Prince Malchezaar
- I hear the music! The Medivas! The party! Tonight is my night!
Emote Response
- Prince Malchezaar
- Simple fools!
Hero Power
- Prince Malchezaar
- You face not Malchezaar alone, but the legions I command!
Boss cards
- Prince Malchezaar
- Demonic Presence(Heroic)
- Surely you did not think you could win.
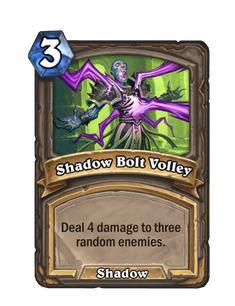
 Shadow Bolt Volley
- I shall be your undoing!
Player's cards
- Prince Malchezaar
- Sacrificial Pact (No longer possible)
- Hahaha! That could never work on a true Eredar Lord!
- Lord Jaraxxus
- Prince Malchezaar
- You! You! That's my invitation!
- Lord Jaraxxus
- Silly prince. Practice karaoke like Jaraxxus!
- We are the Explorer's League and we are a league of explorers!
 Medivh hero
- Prince Malchezaar
- You came in costume? Hmmm... I could do that…
- Medivh
- Oh, wait! You’re me?! From the future? Oh! Tell me...how amazing was this party? It was AWESOME, right?
Death
- Prince Malchezaar
- No! No! Not again!
- Medivh
- Well done! Come on, it's party time!
Adventure completion
- Moroes
- You did it. I can't believe the party started on time. Could you come back next week? It's Medivh's birthday, and, well... I need backup.
Lore[edit | edit source]
Nazra Wildaxe is a warrior of the Old Horde, brought through from the orcish homeworld Draenor. The period makes sense due to the adventure itself being set in the reimagined past of the Warcraft timeline, prior to Medivh's opening of the Dark Portal and the arrival of the orcs on Azeroth. Apparently the adventure is not set too far prior to the portal's opening, however, since the Horde is clearly already established and ready to begin invading new worlds. The Orc Warrior (Heroic) summoning quote "For Blackhand!" refers to the original Warchief of the Horde, Blackhand.
Trivia[edit | edit source]
- The strings for this encounter refer to a third hero, possibly the titanic watcher known as the Maiden of Virtue, another raid boss from the original Karazhan. It appears she was intended as a boss for this encounter, either following Nazra or in her place. However, no data for her or her cards appears to exist in the released game files. When asked about this, Ben Brode replied, "we experimented with many versions of that fight."[2] The watcher's dialogue is reproduced below:
- Opening remark
- You summon an agent of the titans?
- Turn 5
- We are eternal. You are not worthy!
- Hero Power
- Cast out your corrupt thoughts.
- Humility
- Yes! Kneel and you may be spared!
- Eye for an Eye
- Justice is served.
- Emote response
- Your behavior will not be tolerated.
Gallery[edit | edit source]


Patch changes[edit | edit source]
References[edit | edit source]
- ↑ https://www.youtube.com/watch?v=wgcmWaadt2A
- ↑ Ben Brode on Twitter (X). (2016-08-04).